Login
This page contains information on how to access the UBELIX cluster via SSH (Secure Shell).
Log in to UBELIX
Before proceeding make sure that:
- you have your Campus Account activated for UBELIX (see above)
- you have a working SSH client
- Linux/Mac: e.g ssh command in a terminal
- Microsoft Windows: MobaXterm or Windows Subsytem Linux.
- you have familiarized yourself with basic Unix-based terminal commands.
Requirement
Login to UBELIX is only possible from within the UniBE network. If you want to connect from outside, you must first establish a VPN connection. For VPN profiles and instructions see the official tutorial.
Login nodes
There are four login nodes in UBELIX:
- submit01.unibe.ch
- submit02.unibe.ch
- submit03.unibe.ch
- submit04.unibe.ch
To access UBELIX, you can choose any one. If the load on a login node is high, you can log out and pick another one.
Mac/Linux/Unix
Run the following commands in a terminal. Open an SSH connection to :
$ ssh <user>@submit03.unibe.ch
$ ssh <user>@submit03.unibe.ch
Password:
Usually there is no indication of typing when entering your password (not even asterisks or bullets). That’s intended. Just enter your password and press ‘enter’.
After log in successfully you will see the welcome message and the command prompt:
Rocky 9.3 Blue Onyx

FQDN:      submit03.ubelix.unibe.ch
Processor: 128x AMD EPYC 7742 64-Core Processor
Kernel:    5.14.0-362.13.1.el9_3.x86_64
Memory:    128.223 GB

[user@submit03 ~]$
Customize your SSH session
Useful features like SSH alias, X and port forwarding are described on our page SSH customization.
MobaXterm for Windows
MobaXterm combines Terminal sessions with file transfer (scp/ftp) and X Window Server. There are many more features which are not described here. MobaXterm can be downloaded on the MobaXterm Website. There are two versions, portable and installation. You can choose either one.
After installing and starting MobaXterm, a SSH session need to be configured:
- Click ‘Session’ in the top left corner:
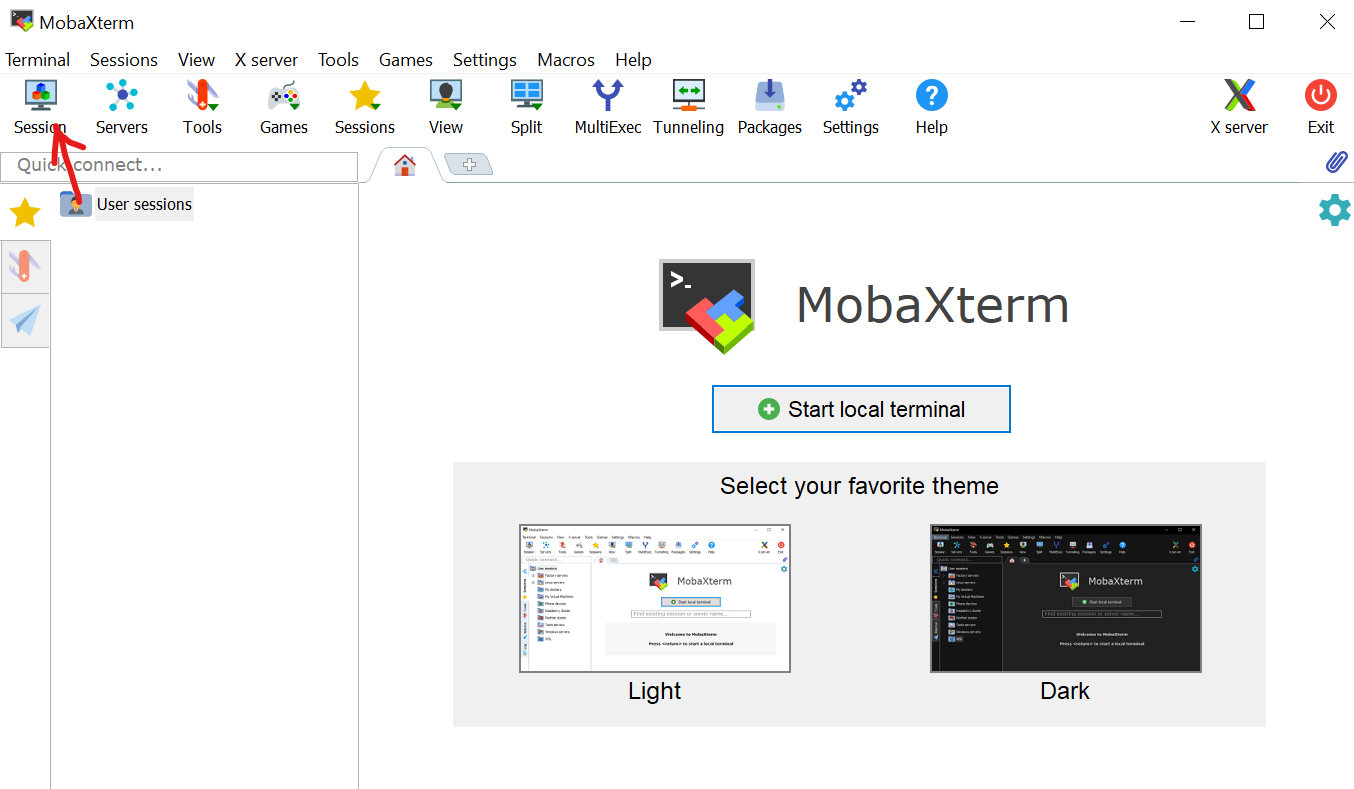
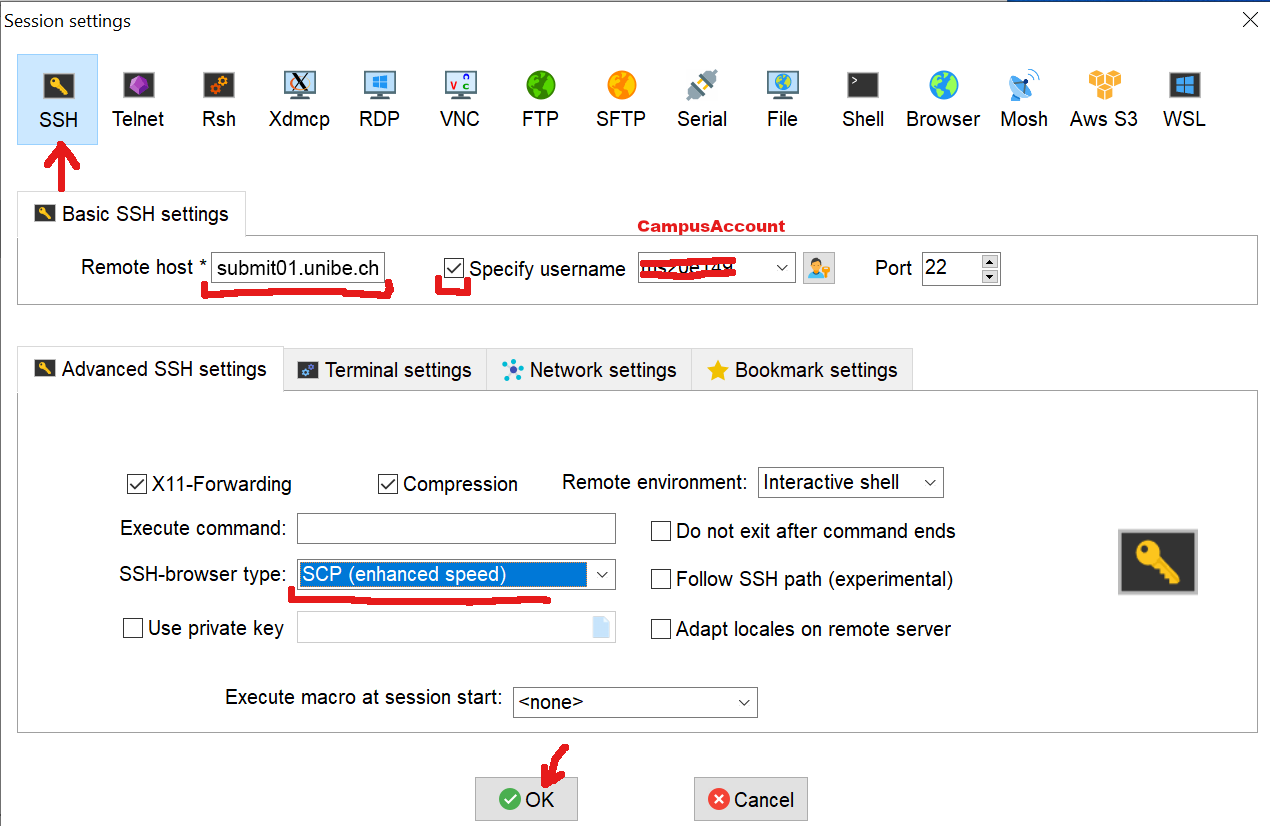
- In “SSH” tab:
- Set the remote host to a login node, e.g. submit01.unibe.ch
- Enable the “Specify username” option and put your Campus Account short name in the corresponding box (here user ms20e149 will be used)
-
In the “Advanced SSH settings”
- Set SSH-browser type to ‘SCP (enhanced speed)’
- Optionally, tick the ‘Follow SSH path’ button
-
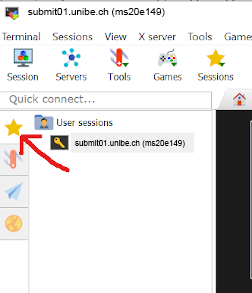
From now one the settings are stored and you can access the session on the left at the star icon
-
MobaXterm will ask you to store the Password and manage a MasterPassword.
After starting the session, you should see the UBELIX login message and prompt.
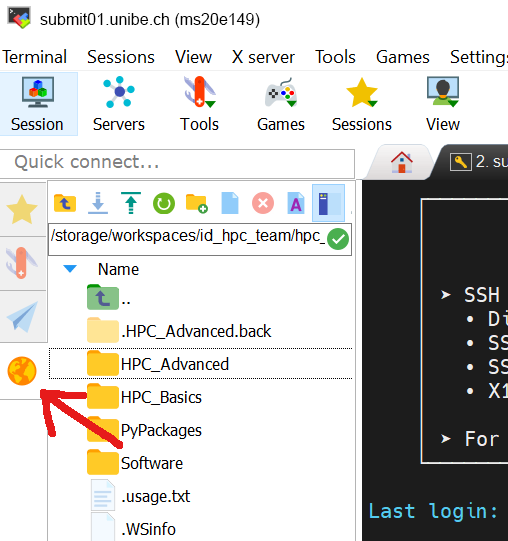
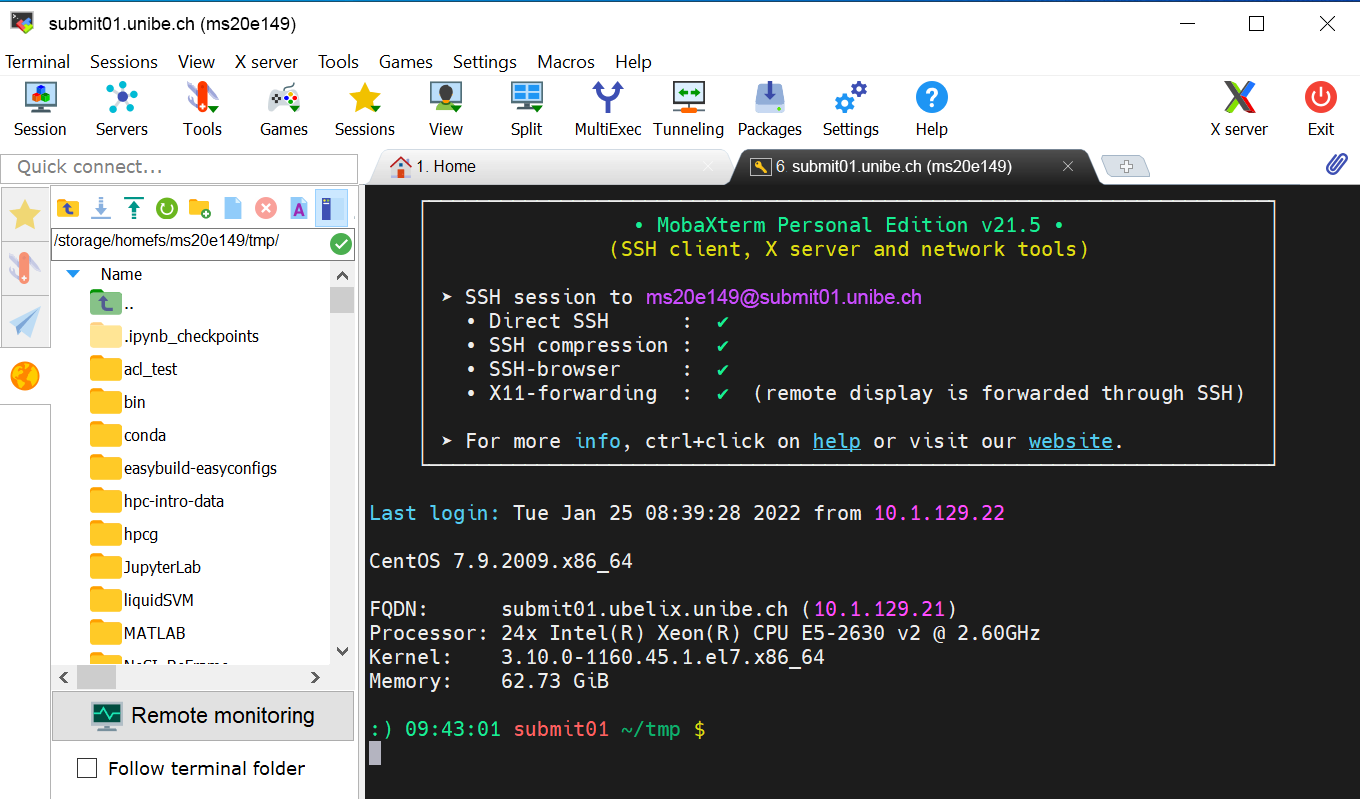 On the left hand side a File browser is located. There the UBELIX file system can be browsed and files up or downloaded, e.g. using drag and drop or the context menue.
